Using Inexpensive DJ LED Lights to Jazz Up Video Productions
Looking beyond the small set of white and bi-color LEDs specifically made for video production, you can find a whole other world of LED fixtures made for other markets--including "disc jockey" LED lights and controllers. For the cost of one good fresnel light, you can have a multi-light, expandable LED lighting package.
Good-quality light fixtures are well worth the money spent as they will provide years, even decades of faithful service. But a single, good fresnel light head, stand, doors, etc. can easily run several hundred dollars. Then, to get creative, you still need an external dimmer, and several colored gels to craft the light into something more creative.
Alternatively, LED panels have been gaining popularity for their energy efficiency and cool running features. Looking beyond the small set of white and bi-color LEDs specifically made for video production, you can find a whole other world of LED fixtures made for other markets--including "disc jockey" LED lights and controllers. For the cost of one good fresnel light, you can have a multi-light, expandable LED lighting package.
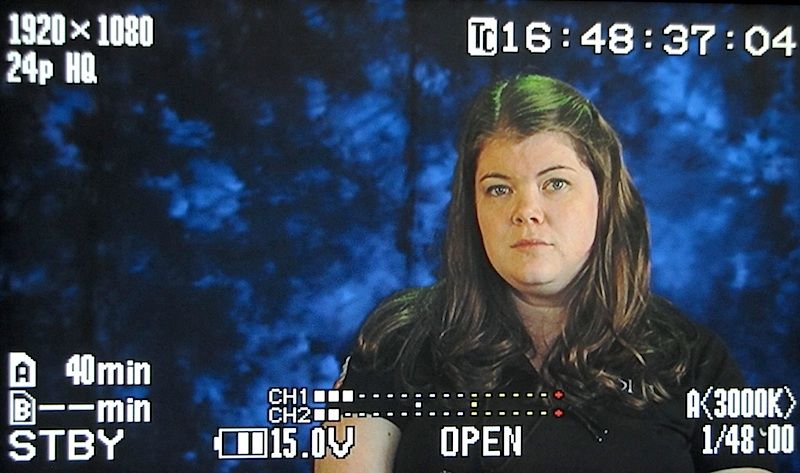
A subject lit in the "hot seat"
My LED-Based Lighting System
I selected a low-end system with the premise of keeping the total cost of the system to just a few hundred dollars. I ended up with a four-light/controller package that was under $300. For this, I acquired four 86-LED light heads, small floor stands, and the controller.
The controller and the light heads all use the DMX-512 control standard for lighting. This standard uses 3-pin microphone cable with XLR jacks at either end to pass the digital control signals from the controller to all the light heads. There is another DMX standard that uses a 5-pin cable, but I wanted to stay with something that used the mic cables I already had on hand. This saves cost and is convenient on location when one cable can be used for either microphones or lighting, as opposed to having to bring two different sets of cable.
The small metal light heads I chose are among dozens and dozens of DMX-controllable light fixtures available. I wanted something small so I could fit several into a single Pelican case, along with the controller and mic cable. I also wanted many small LEDs in each head as opposed to some of the newer fixtures that use fewer, but more powerful LEDs. If I need to try to control the light, I wanted any edge to be "softer" as opposed to seeing 2 big red shadows on the wall. These also ended up being the cheapest lights.
Future Additions to My Lighting Kit
In the future, I can add to my system some specialty lights, like a long bar of LED lights which would work well for a hair light/backlight, as opposed to a single small light head. I can add "white only" light heads for specific uses. I can add larger panels and uses several of them to equate a "softbox" effect.
It's like using lego pieces for lights--you can build what you want.
Controlling and Setting Up the Light Heads
The light heads have a row of DIP switches to set the lights to different features by themselves, with no external control. So if you needed a simple green wash for a cyc, you could do that with no external controller and then just put all the LED heads on one AC circuit you enable with one light switch.
There are two XLR jacks on each head, one for DMX in, and a second to daisy-chain the DMX on to the next head. These light heads also have an AC outlet on them to daisychain power. If the power cords were longer than just a couple of feet, this would be more useful. Lastly, there's a fuse.
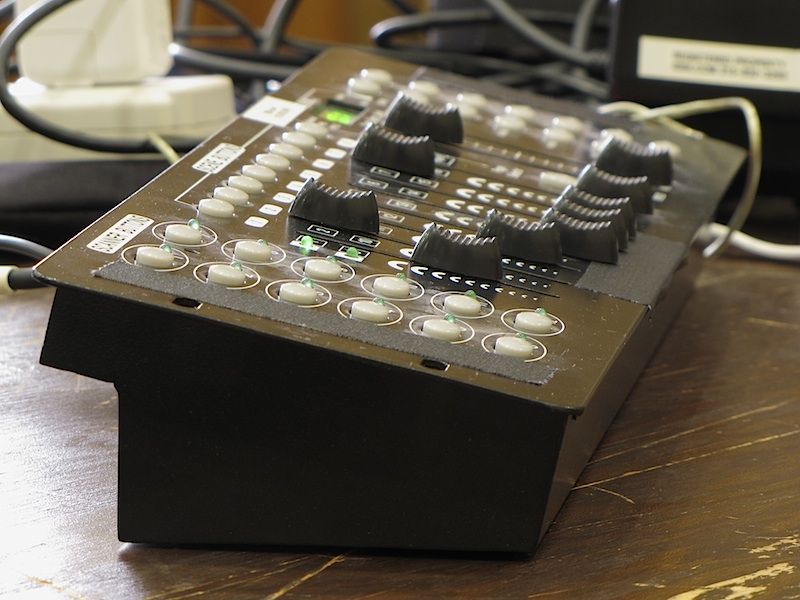
The small DMX controller that sets up each light, controls each color intensity, and saves scenes to be recalled with the push of a button.
Initial setup is pretty simple. You adjust the DIP switches to either tell the light what to do directly, or to set it up for DMX control. When setting it up for DMX, you then also assign each head a number, so you can "talk" directly to that light head from the controller. On the controller I have, I can talk to up to 12 different lights.
But there's really even more flexibility than that. You can set any amount of light heads to the same number so you can control 4 heads as if they were one. So you are by no means limited to 12 when you can "gang" multiple light heads together and control them as if they were one head.
Make your settings, turn on the DMX controller and start your programming. My light heads use 7 channels for control: 1--green; 2--red; 3--blue; 4, 5, 6, I didn't use; and 7--master dimmer of all colors. I entered Program Mode on the controller, set up my scene, and saved it.
There are more complex heads that use up more channels. For instance, an "intelligent" light head that will need the same basic 7 channels I use, but then also add rotation, elevation, focus, internal gobos, rotation of the internal effects, and more. Using a circle or star pattern, out of focus, with a very slow rotation would be a great way to get a soft, mottled background that actually moves or undulates the whole time.
There are eight scene-push buttons across the top of my board. Then there are two "pages" per "bank" and there are 30 banks. Even though this is one of the smallest boards made, I could save 480 different scenes. This is useful for a stage show or a concert, but way more than I need for some talking heads.